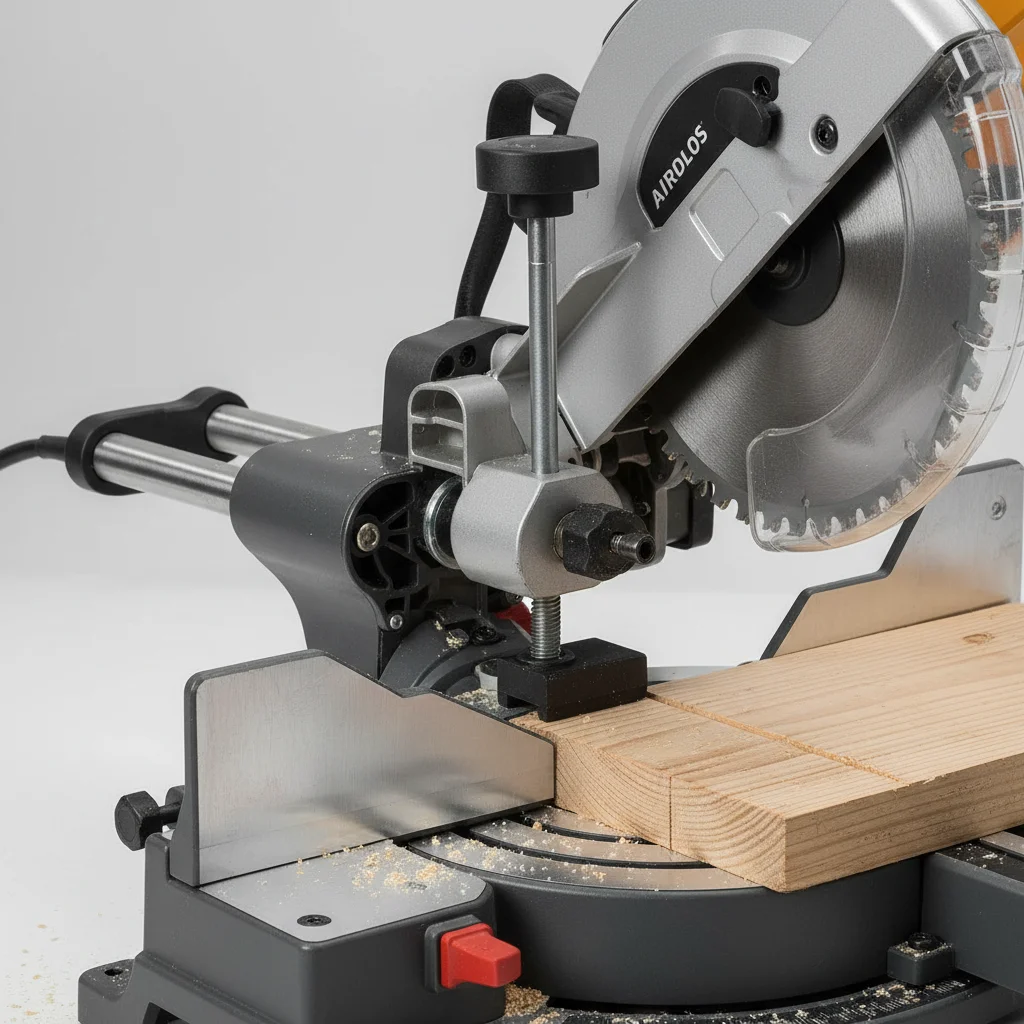
Adjusting your miter saw depth stop is crucial for achieving consistent, repeatable cuts, especially when working on dadoes, rabbets, or half-lap joints. There are typically three main methods to adjust the depth stop on most miter saws, ensuring you can precisely control the cutting depth for various woodworking and DIY projects.
Understanding Your Miter Saw’s Depth Stop Mechanism
Most miter saws feature a depth stop mechanism, often a threaded rod or a simple bolt, located near the saw’s pivot point or behind the blade guard. This mechanism prevents the blade from descending beyond a set point, allowing for non-through cuts. Familiarizing yourself with its location and how it interacts with the saw’s base or a dedicated stop block is the first step in making accurate adjustments.
Method 1: Using the Threaded Rod and Nut
Many miter saws, particularly compound and sliding models, utilize a threaded rod with a locking nut for depth adjustment. To use this method, first, unplug your saw for safety. Lower the blade until it just touches the workpiece or a reference surface. Then, loosen the locking nut on the threaded rod. Rotate the rod clockwise to decrease the cutting depth or counter-clockwise to increase it. Once the desired depth is set, tighten the locking nut securely to prevent any movement during operation. This method offers fine-tune adjustments for precise control.
Method 2: Adjusting the Stop Bolt or Screw
|
Our Picks for the Best Miter Saw in 2026
As an Amazon Associate I earn from qualifying purchases.
|
||
| Num | Product | Action |
|---|---|---|
| 1 | Miter Saw Laser Guide - Miter and Portable Saw Laser Guide, Miter & Portable Saws |

|
| 2 | Stanley 1-20-600 Saw Storage Miter Box with Saw, Black |
|
| 3 | WEN Universal Collapsible Miter Saw Stand, 350-Pound Capacity (MSA200) |
|
| 4 | Seesii Mini Circular Saw with Laser Guide,4.8A 4000 RPM Compact Corded Circular Saw with Rip Guide,3 Blades (4-1/2") for Wood,Soft Metal,Tile,Plastic Cutting,Max Cut Depth 1-11/16"(90°),1-1/8" (45°) |
|
| 5 | Metabo HPT 12-Inch Compound Miter Saw | Xact Cut LED Shadow Line System | Dual Bevel | C12FDHB |
|
| 6 | HAUTMEC 14 Inch Clamping Miter Box with Adjustable Jaw & 4 Anti-Slip Clamps, Heavy Duty ABS Mitre Saw Box with 22.5°, 45°, 90° Cutting Angles for Woodworking, Trim, Frames, DIY Projects – HTHDM25036 |
|
| 7 | WEN MM0713 9.5-Amp 7.25-Inch Single Bevel Compact Sliding Compound Miter Saw with LED Cutline Guide, Black |
|
| 8 | Olson Saw 35-241 Fine Kerf Saw 35-550 42 tpi with Aluminum Thin Slot Miter Box, Slot Size .014-Inch, Slot Angles 45, 60, 90, Cutting Depth 7/8-Inch, Pack of 1 |
|
| 9 | Makita LS0816F 8-1/2” Slide Compound Miter Saw |
|
| 10 | SKIL 3601-02 Flooring Saw with 36T Contractor Blade, Red and black |
|
Some miter saws, especially older or more basic models, may have a simpler stop bolt or screw that limits the downward travel of the saw head. To adjust this, ensure the saw is unplugged. Locate the stop bolt, which is often found on the saw’s arm or base. Loosen the bolt and then manually lower the saw blade to the desired depth. While holding the saw at this depth, tighten the stop bolt against its contact point. This method is straightforward but may offer less granular control compared to a threaded rod system.
Method 3: Utilizing a Dedicated Depth Stop Lever
A few advanced miter saws incorporate a dedicated depth stop lever or knob, designed for quick and easy adjustments. With the saw unplugged, engage the lever or rotate the knob to release the depth stop. Lower the blade to the desired depth, often indicated by a scale or a visual reference. Then, re-engage the lever or knob to lock the depth in place. This design is particularly convenient for projects requiring frequent depth changes.
Tips for Achieving Consistent Depth Cuts
- Always unplug your miter saw before making any adjustments to the depth stop.
- Use a scrap piece of the actual material you’ll be cutting to test your depth settings.
- Make small, incremental adjustments and re-test until you achieve the perfect depth.
- Regularly clean any sawdust or debris from the depth stop mechanism to ensure smooth operation.
- Consider marking your frequently used depth settings for quick recall on future projects.
Mastering the adjustment of your miter saw’s depth stop will significantly enhance the versatility and precision of your woodworking and DIY projects. Whether you’re cutting dados for shelving or creating intricate joinery, accurate depth control is paramount for professional-looking results. Always prioritize safety by unplugging your saw before any adjustments and wearing appropriate personal protective equipment during operation.
Get our weekly buyer guide
Practical specs, not advice. Unsubscribe anytime.
