Your miter saw is burning wood primarily due to excessive friction between the blade and the workpiece, often caused by a dull blade, incorrect feed rate, or pitch buildup. This issue generates intense heat, scorching wood fibers and leaving unsightly marks. Addressing common culprits like blade condition, feed rate, and alignment can quickly resolve the problem, ensuring clean, precise cuts and extending tool longevity.
Understanding Wood Burning: The Root Causes
Wood burning occurs primarily due to excessive friction between the saw blade and the workpiece. This friction generates intense heat, which then scorches the wood fibers, leaving behind brown or black marks. Several factors contribute to this unwelcome phenomenon, ranging from the condition of your blade to your cutting approach. When the blade struggles to efficiently remove material, it essentially rubs against the wood for too long, building up heat. This can not only damage your material but also put undue strain on your saw’s motor and potentially dull your blade faster.
5 Quick Fixes to Stop Your Miter Saw from Burning Wood
Addressing burn marks often boils down to a few key adjustments and maintenance practices. By systematically checking these common culprits, you can quickly diagnose and resolve the issue, returning to clean, efficient cutting.
1. Dull Blade or Incorrect Tooth Count
A dull blade is perhaps the most frequent offender when it comes to burning wood. Over time, blade teeth lose their sharpness, making it harder for them to slice through wood fibers. Instead, they begin to rub and tear, generating significant friction and heat. Similarly, using a blade with too high a tooth count for a particular material can also cause burning. While more teeth often mean a finer finish, they also mean each tooth removes less material per rotation, increasing contact time and friction, especially in thicker or softer woods.
The solution here is straightforward: replace or sharpen your miter saw blade. A sharp, new blade will effortlessly cut through wood, minimizing friction. For general-purpose cross-cutting, a blade with 60-80 teeth is often suitable for a 10-inch miter saw. If you’re cutting a lot of very hard wood or thinner stock where a super fine finish is paramount, a higher tooth count might be acceptable, but always be mindful of your feed rate. Conversely, for rougher cuts or very thick material, a lower tooth count (e.g., 40-60 teeth) allows for faster material removal and less heat buildup.
2. Improper Feed Rate
The speed at which you push the saw blade through the wood, known as the feed rate, profoundly impacts whether you’ll see burn marks. Cutting too slowly is a common mistake; it allows the spinning blade to dwell in contact with the wood for an extended period, creating excessive friction and heat. The blade isn’t efficiently evacuating chips, leading to constant rubbing. On the other hand, forcing the blade through the wood too quickly can also cause issues. While a faster feed rate generally reduces burn, pushing too hard can bog down the motor, cause the blade to deflect, and also lead to burning if the saw can’t keep up.
To correct this, maintain a consistent and appropriate feed rate. Let the saw do the work. Apply steady, moderate pressure, allowing the blade to cut cleanly through the material without slowing down the motor excessively. Experiment with scrap pieces to find the optimal speed for the specific wood you’re cutting. The goal is to move the blade through the wood at a pace that allows it to efficiently remove chips without lingering or struggling.
3. Dirty Blade with Pitch and Resin Buildup
Even a perfectly sharp blade can perform poorly if it’s coated in pitch, resin, or glue buildup. These sticky residues accumulate on the blade’s surface and between the teeth, effectively dulling the cutting edges and increasing the blade’s thickness. This buildup creates drag and friction as the blade tries to pass through the wood, leading to increased heat and, consequently, burning. Over time, a dirty blade can become as inefficient as a dull one.
The fix for this is simple and highly effective: clean your miter saw blade regularly. You can purchase specialized blade cleaning solutions or use household items like oven cleaner (with caution and proper ventilation) or a degreaser. Apply the cleaner, let it soak according to instructions, and then scrub away the gunk with a brass brush or a stiff nylon brush. Always ensure the blade is thoroughly rinsed and dried to prevent rust. A clean blade will cut sharper, cooler, and extend its lifespan.
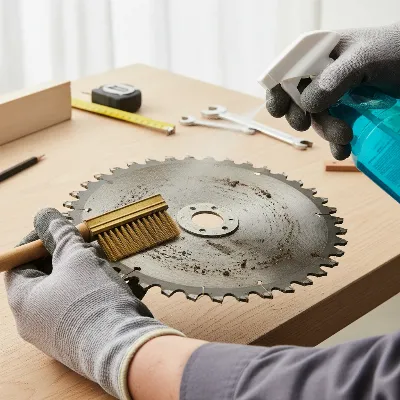 A person cleaning a miter saw blade to remove pitch buildup, preventing wood burning
4. Blade Installed Incorrectly
It might sound obvious, but an incorrectly installed blade is a surprisingly common reason for severe wood burning. If the blade is mounted backward, the teeth will not be oriented to cut the wood effectively. Instead, they will scrape against the material, creating immense friction, excessive heat, and often a lot of smoke, resulting in immediate and significant burn marks. Beyond burning, a backward blade will also make the saw feel like it’s struggling immensely, even with light pressure.
Always ensure your miter saw blade is installed with the teeth pointing in the correct cutting direction. Most blades have an arrow indicating the direction of rotation, which should match the arrow or rotation direction indicated on your saw. Before every use, take a moment to double-check that the blade is securely fastened and oriented correctly. This simple verification can save you a lot of headache and burnt material.
5. Misaligned Saw Components
While often associated more with table saws, proper alignment is crucial for miter saws too. If your miter saw’s fence or table is not perfectly square to the blade, or if the blade itself is slightly out of square relative to the motor shaft (though less common with modern saws), it can cause the wood to bind as you cut. When wood binds, it increases the contact area with the blade and creates additional friction on the sides of the blade, leading to burning. Even a slight deviation can result in poor cuts and scorched edges.
To remedy this, periodically check and adjust your miter saw’s alignment. Use a reliable combination square to ensure your fence is perfectly perpendicular to the saw’s table at 0 degrees. Check the blade’s squareness to the fence and table, especially after any heavy use or if the saw has been moved. Consult your saw’s manual for specific instructions on how to calibrate these components. A precisely aligned saw ensures the blade passes through the wood without unnecessary rubbing or binding.
Advanced Tips for Pristine Cuts and Longevity
Beyond the quick fixes, adopting a few advanced practices can further enhance your cutting quality and extend the life of your miter saw. Different wood species have varying densities and resin content; some, like cherry or maple, are more prone to burning than softer woods. Adjusting your feed rate and blade choice accordingly can help. Always ensure your wood is properly supported during cuts, preventing movement or vibration that can contribute to binding and burning. Also, allow your miter saw to reach its full operational speed before engaging the blade with the workpiece; this ensures the teeth are moving fast enough to clear chips efficiently from the start. Finally, investing in higher-quality blades designed for specific tasks can make a significant difference, as premium blades often feature anti-friction coatings and superior carbide tips that stay sharper longer.
Maintaining Your Miter Saw for Optimal Performance
Consistent maintenance is key to preventing recurring burning issues and ensuring your miter saw remains a reliable tool. This goes beyond just cleaning the blade. Regularly inspect your saw for any loose bolts or screws, especially around the blade guard and fence. Clean dust and debris from the motor vents to prevent overheating. If your saw is older or heavily used, periodically check carbon motor brushes for wear and replace them if necessary, as worn brushes can lead to reduced power and efficiency. Proper storage of spare blades in protective sleeves or cases will prevent damage to the teeth, keeping them sharp and ready for use.
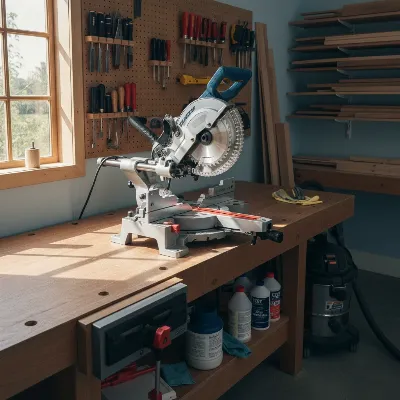 A well-maintained miter saw in a clean workshop setting, emphasizing tool care.
Where to Find High-Quality Miter Saw Blades and Accessories
To achieve the best cuts and minimize burning, selecting the right blade is paramount. You can find high-quality miter saw blades and accessories at reputable hardware stores, specialty woodworking shops, and major online retailers. Look for brands known for their precision and durability, and always choose a blade that matches your saw’s arbor size and is designed for the specific types of cuts and materials you’ll be working with most often. Reading reviews and understanding blade specifications, such as tooth grind and anti-friction coatings, can help you make an informed choice that will pay dividends in cutting performance.
Conclusion
Encountering burn marks from your miter saw can be a frustrating roadblock, but it’s a problem with clear and actionable solutions. By methodically addressing issues like dull or dirty blades, adjusting your feed rate, ensuring correct blade installation, and verifying saw alignment, you can quickly restore your miter saw’s cutting precision. These five quick fixes are your go-to guide for transforming charred edges into crisp, clean cuts. Remember, consistent attention to your tool’s condition and your cutting technique will not only prevent burning but also significantly enhance your woodworking experience and the longevity of your equipment. What’s the most common miter saw problem you’ve faced, and how did you resolve it?
Frequently Asked Questions
Why does my new miter saw blade burn wood?
Even new blades can burn wood if they are the wrong tooth count for the material, you’re using an incorrect feed rate, or the blade has accumulated pitch from a previous cut. Always verify these factors first.
What tooth count blade is best to prevent burning?
For general cross-cutting with a miter saw, a 60-80 tooth blade on a 10-inch saw is often ideal, balancing cut quality with efficient chip removal. For very thick material, fewer teeth can reduce friction.
Can too much pressure cause burning?
While often a slow feed rate is the culprit, forcing the blade through wood too quickly can bog down the motor, causing it to slow and creating more friction, which can also lead to burning. A steady, consistent pressure is best.
How often should I clean my miter saw blade?
It’s good practice to clean your blade after every few hours of use, or whenever you notice significant pitch buildup, especially when working with resinous woods. Regular cleaning maintains sharpness and efficiency.
Is it okay to cut burnt wood?
While you can cut burnt wood, the burnt areas are often harder and can accelerate blade dulling. It’s best to fix the burning issue first to ensure clean cuts and avoid unnecessary wear on your blade.
Frequently Asked Questions
Why does my new miter saw blade burn wood?
Even new miter saw blades can burn wood if the tooth count is unsuitable for the material, the feed rate is incorrect, or pitch has accumulated from previous cuts. Always check these factors to ensure optimal performance and prevent scorching.
What tooth count blade is best to prevent burning?
For general cross-cutting with a 10-inch miter saw, a 60-80 tooth blade is typically ideal, as it balances cut quality with efficient chip removal. For very thick materials, a blade with fewer teeth (e.g., 40-60) can reduce friction and heat buildup.
Can too much pressure cause burning with a miter saw?
While a slow feed rate is a common cause, forcing the blade through wood too quickly can also lead to burning. Excessive pressure can bog down the motor, causing the blade to slow and generate more friction. A steady, consistent pressure allows the blade to cut efficiently.
How often should I clean my miter saw blade?
It is good practice to clean your miter saw blade after every few hours of use, or whenever you observe significant pitch and resin buildup. Regular cleaning is crucial for maintaining sharpness, efficiency, and extending the blade's lifespan, especially when cutting resinous woods.
Is it okay to cut wood that has already been burnt?
While it is possible to cut wood that has already been burnt, the scorched areas are often harder and can accelerate blade dulling. It is best to resolve the burning issue first to ensure clean cuts and minimize unnecessary wear on your miter saw blade.
Stop Your Miter Saw from Burning Wood
Follow these steps to diagnose and fix common issues causing your miter saw to burn wood, ensuring clean and precise cuts.
Inspect your miter saw blade for dullness or incorrect tooth count. A dull blade or one with too many teeth for the material will generate excessive friction. Replace or sharpen the blade, opting for a 60-80 tooth blade for general cross-cutting on a 10-inch saw.
Evaluate your cutting speed. Cutting too slowly allows the blade to dwell, causing friction, while forcing it too fast can bog down the motor. Maintain a consistent, moderate feed rate, allowing the saw to cut without excessive effort or lingering.
Examine your blade for sticky pitch or resin accumulation, which dulls cutting edges and increases friction. Clean the blade regularly using specialized solutions or degreasers, scrubbing with a brass or nylon brush, then rinsing and drying thoroughly.
Ensure the miter saw blade is installed correctly with teeth pointing in the proper cutting direction. A backward blade will scrape rather than cut, causing immediate and significant burning. Always check the rotation arrow on the blade and saw before use.
Periodically check your miter saw's fence and table for squareness to the blade. Misalignment can cause wood to bind, increasing friction and leading to burning. Use a combination square to ensure components are perfectly perpendicular, consulting your manual for calibration.
Get our weekly buyer guide
Practical specs, not advice. Unsubscribe anytime.
This was really helpful. I always thought it was just my cheap saw, but realizing the feed rate was too slow made a huge difference. My cuts are much cleaner now, though I still get a tiny bit of burning on really dense hardwoods if I’m not super careful. Still, a big improvement!
My miter saw was leaving awful burn marks on every cut, making my furniture pieces look amateurish. I followed the suggestion to check for blade alignment, and that was exactly it! A quick adjustment, and now my cuts are perfectly smooth. This saved me from buying a new saw.
The advice on blade condition was spot on, but I wish there was more detail on specific blade types for different woods. I replaced my dull blade, and it helped a lot with the burning, but I’m still getting some tear-out. Maybe I need a different tooth count for my pine projects.
I was getting so frustrated with my cuts looking terrible, especially on oak. The tip about pitch buildup was a game-changer for me. I cleaned my blade thoroughly, and suddenly, no more burning! My projects look so much more professional now. Thanks for the clear advice.