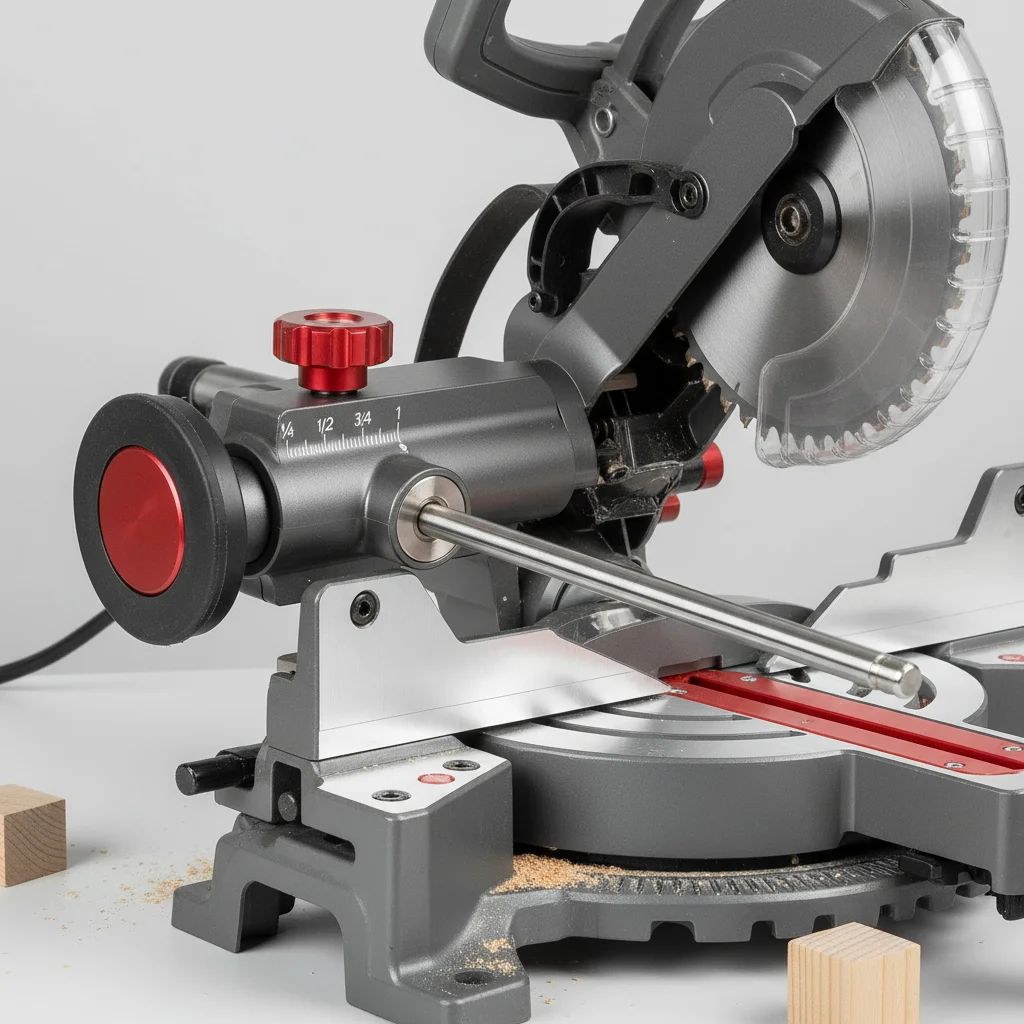
A miter saw depth stop is a crucial feature for achieving consistent and repeatable cuts, especially when working on projects that require identical pieces. This often overlooked component allows you to limit how far the blade descends into your workpiece, preventing over-cutting and ensuring uniform depth across multiple cuts. Understanding how to properly adjust and utilize your miter saw’s depth stop can significantly improve the precision and efficiency of your woodworking and DIY projects.
Understanding the Miter Saw Depth Stop Mechanism
Most miter saws come equipped with a depth stop, though its exact design can vary between models. Typically, it involves a threaded rod or a simple bolt that can be adjusted to control the downward travel of the saw head. When engaged, this stop physically prevents the blade from cutting deeper than the set limit. This is particularly useful for tasks like cutting dados, grooves, or even making partial cuts for joinery, where you don’t want to cut all the way through the material. For more miter saws guides on this site.
Step-by-Step Adjustment for Perfect Depth
Adjusting your miter saw depth stop is a straightforward process. First, ensure your saw is unplugged for safety. Lower the blade until it just touches the surface of your workpiece. Then, locate the depth stop mechanism, usually a knob or lever on the back or side of the saw head. Loosen the locking mechanism and adjust the stop until it makes contact with the saw’s base or a designated stopping point, preventing further downward movement. Make a test cut on a scrap piece to verify the depth, and fine-tune as needed. Remember to always re-tighten the locking mechanism after adjustment to prevent any movement during operation.
Applications Beyond Basic Cuts
|
Our Picks for the Best Miter Saw in 2026
As an Amazon Associate I earn from qualifying purchases.
|
||
| Num | Product | Action |
|---|---|---|
| 1 | Metabo HPT 12-Inch Compound Miter Saw | Xact Cut LED Shadow Line System | Dual Bevel | C12FDHB |

|
| 2 | WEN MM0713 9.5-Amp 7.25-Inch Single Bevel Compact Sliding Compound Miter Saw with LED Cutline Guide, Black |
|
| 3 | Stanley 1-20-600 Saw Storage Miter Box with Saw, Black |
|
| 4 | Miter Saw Laser Guide - Miter and Portable Saw Laser Guide, Miter & Portable Saws |
|
| 5 | SKIL 3601-02 Flooring Saw with 36T Contractor Blade, Red and black |
|
| 6 | Makita LS0816F 8-1/2” Slide Compound Miter Saw |
|
| 7 | WEN Universal Collapsible Miter Saw Stand, 350-Pound Capacity (MSA200) |
|
| 8 | Olson Saw 35-241 Fine Kerf Saw 35-550 42 tpi with Aluminum Thin Slot Miter Box, Slot Size .014-Inch, Slot Angles 45, 60, 90, Cutting Depth 7/8-Inch, Pack of 1 |
|
| 9 | Seesii Mini Circular Saw with Laser Guide,4.8A 4000 RPM Compact Corded Circular Saw with Rip Guide,3 Blades (4-1/2") for Wood,Soft Metal,Tile,Plastic Cutting,Max Cut Depth 1-11/16"(90°),1-1/8" (45°) |
|
| 10 | HAUTMEC 14 Inch Clamping Miter Box with Adjustable Jaw & 4 Anti-Slip Clamps, Heavy Duty ABS Mitre Saw Box with 22.5°, 45°, 90° Cutting Angles for Woodworking, Trim, Frames, DIY Projects – HTHDM25036 |
|
While often associated with simple depth control, the miter saw depth stop has several advanced applications. For instance, it’s invaluable for cutting tenons or half-lap joints where precise, non-through cuts are essential. It can also be used to create decorative grooves or channels in wood, adding a professional touch to your projects. When combined with a well-calibrated fence, the depth stop allows for intricate joinery that would otherwise require specialized tools. Consider investing in a high-quality miter saw with an easily accessible and robust depth stop for maximum versatility.
Troubleshooting Common Depth Stop Issues
Occasionally, you might encounter issues with your miter saw depth stop. The most common problem is inconsistent depth, which can often be traced back to a loose locking mechanism or a bent stop rod. Always check that the stop is securely tightened before making cuts. If the rod appears bent, it may need to be replaced. Another issue can be sawdust accumulation around the mechanism, preventing smooth adjustment. Regularly clean your saw, especially around moving parts, to ensure optimal performance. If you’re consistently struggling with precision, it might be time to review your saw’s manual or consult with an experienced woodworker.
Maintaining Your Miter Saw for Consistent Performance
Proper maintenance is key to ensuring your miter saw, including its depth stop, functions reliably for years. This includes regular cleaning to remove sawdust and debris, especially from the moving parts and adjustment mechanisms. Periodically check all bolts and screws for tightness, and lubricate any sliding components as recommended by the manufacturer. A well-maintained saw not only performs better but also enhances safety in your workshop. For critical projects, consider a model known for its durable construction and precise adjustments.
- Regularly clean sawdust from the depth stop mechanism.
- Check and tighten all locking knobs and bolts.
- Lubricate sliding parts as per the manufacturer’s guide.
- Inspect the depth stop rod for any signs of bending or damage.
- Perform test cuts on scrap material after any adjustment.
Get our weekly buyer guide
Practical specs, not advice. Unsubscribe anytime.
