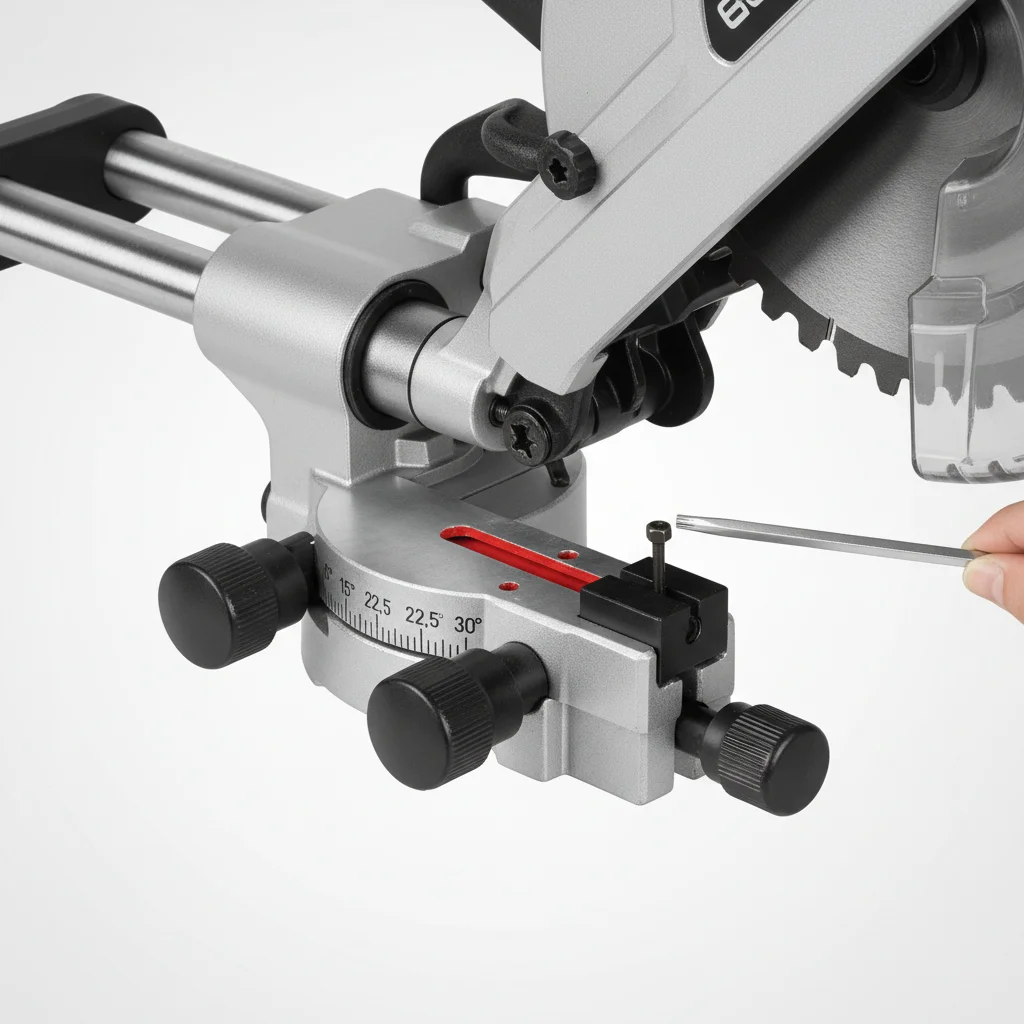
Adjusting miter saw bevel stops is crucial for achieving precise angled cuts in woodworking and DIY projects. There are typically three main bevel stops on most miter saws: 0 degrees (for straight cuts), 45 degrees left, and 45 degrees right. Understanding how to fine-tune these factory settings can significantly improve the accuracy and quality of your work, preventing common issues like gaps in joinery or uneven edges. This guide will walk you through the process of calibrating your saw’s bevel stops to ensure every cut is perfectly aligned.
Understanding Your Miter Saw’s Bevel System
Before making any adjustments, it’s important to familiarize yourself with your specific miter saw’s bevel mechanism. Most saws feature a bevel lock lever or knob that secures the saw head at a desired angle, along with a bevel scale that indicates the current angle. The bevel stops are usually small screws or pins that limit the travel of the saw head at common angles, preventing it from going past a certain point. These stops are designed to provide quick and repeatable settings, but they can sometimes drift out of calibration due to vibration, wear, or manufacturing tolerances.
Tools Required for Bevel Stop Adjustment
To accurately adjust your miter saw’s bevel stops, you’ll need a few essential tools. A high-quality digital angle finder or a reliable combination square is paramount for verifying angles. You’ll also need the appropriate wrench or Allen key for the adjustment screws on your specific saw model, which can vary between manufacturers. Finally, a piece of scrap wood for test cuts is always recommended to confirm your adjustments. Ensure your saw is unplugged before performing any adjustments for safety.
- Digital Angle Finder or Combination Square
- Appropriate Wrench or Allen Key (check your saw’s manual)
- Scrap Wood (for test cuts)
- Safety Glasses
Step-by-Step Guide to Adjusting Bevel Stops
|
Our Picks for the Best Miter Saw in 2026
As an Amazon Associate I earn from qualifying purchases.
|
||
| Num | Product | Action |
|---|---|---|
| 1 | Stanley 1-20-600 Saw Storage Miter Box with Saw, Black |

|
| 2 | Seesii Mini Circular Saw with Laser Guide,4.8A 4000 RPM Compact Corded Circular Saw with Rip Guide,3 Blades (4-1/2") for Wood,Soft Metal,Tile,Plastic Cutting,Max Cut Depth 1-11/16"(90°),1-1/8" (45°) |
|
| 3 | WEN MM0713 9.5-Amp 7.25-Inch Single Bevel Compact Sliding Compound Miter Saw with LED Cutline Guide, Black |
|
| 4 | Makita LS0816F 8-1/2” Slide Compound Miter Saw |
|
| 5 | Miter Saw Laser Guide - Miter and Portable Saw Laser Guide, Miter & Portable Saws |
|
| 6 | SKIL 3601-02 Flooring Saw with 36T Contractor Blade, Red and black |
|
| 7 | Olson Saw 35-241 Fine Kerf Saw 35-550 42 tpi with Aluminum Thin Slot Miter Box, Slot Size .014-Inch, Slot Angles 45, 60, 90, Cutting Depth 7/8-Inch, Pack of 1 |
|
| 8 | WEN Universal Collapsible Miter Saw Stand, 350-Pound Capacity (MSA200) |
|
| 9 | HAUTMEC 14 Inch Clamping Miter Box with Adjustable Jaw & 4 Anti-Slip Clamps, Heavy Duty ABS Mitre Saw Box with 22.5°, 45°, 90° Cutting Angles for Woodworking, Trim, Frames, DIY Projects – HTHDM25036 |
|
| 10 | Metabo HPT 12-Inch Compound Miter Saw | Xact Cut LED Shadow Line System | Dual Bevel | C12FDHB |
|
The process for adjusting bevel stops involves a series of checks and minor tweaks. First, ensure your saw is unplugged. Loosen the bevel lock and set the saw head to the 0-degree position. Use your digital angle finder against the blade and the saw table to check for a perfect 90-degree angle. If it’s off, locate the 0-degree bevel stop screw (often at the back or side of the saw head) and make small adjustments until the angle is precisely 90 degrees. Tighten the lock and re-check. Repeat this process for the 45-degree left and right stops, using the angle finder to verify the 45-degree angle. Some saws may have a detent override or a separate adjustment for these angles.
After adjusting the 0-degree stop, move on to the 45-degree stops. Loosen the bevel lock and tilt the saw head to the 45-degree left position. Engage the 45-degree left stop. Use your angle finder to measure the angle between the blade and the table. If it’s not exactly 45 degrees, locate the corresponding adjustment screw for the 45-degree left stop and turn it incrementally until the angle is correct. Tighten the bevel lock and re-check. Repeat this exact procedure for the 45-degree right bevel stop. It’s crucial to make small, precise adjustments and re-measure after each turn to avoid over-adjusting.
Performing Test Cuts and Final Verification
Once you’ve made all the necessary adjustments to your bevel stops, it’s essential to perform test cuts on scrap wood to verify the accuracy. Cut a piece of scrap wood at 0 degrees, then at 45 degrees left and 45 degrees right. Use your angle finder or combination square to check the angles of your cuts. For the 0-degree cut, you can also join two pieces together to see if they form a perfect 90-degree corner. For 45-degree cuts, joining two pieces should create a perfect 90-degree corner. If any cuts are still off, repeat the adjustment process for that specific bevel stop until you achieve perfect results. This iterative process ensures your saw is calibrated for optimal performance.
Maintaining Bevel Stop Accuracy
Regular maintenance can help keep your miter saw’s bevel stops accurate over time. Periodically clean any sawdust or debris from the bevel mechanism and adjustment screws, as accumulation can interfere with precise settings. Check the tightness of all screws and bolts related to the bevel system. If you frequently transport your miter saw, it’s a good practice to re-check the bevel calibration before starting a new project, as vibrations during transport can sometimes cause minor shifts. Investing in a high-quality digital angle finder will make these checks quick and easy, ensuring consistent accuracy for all your woodworking endeavors.
Get our weekly buyer guide
Practical specs, not advice. Unsubscribe anytime.
