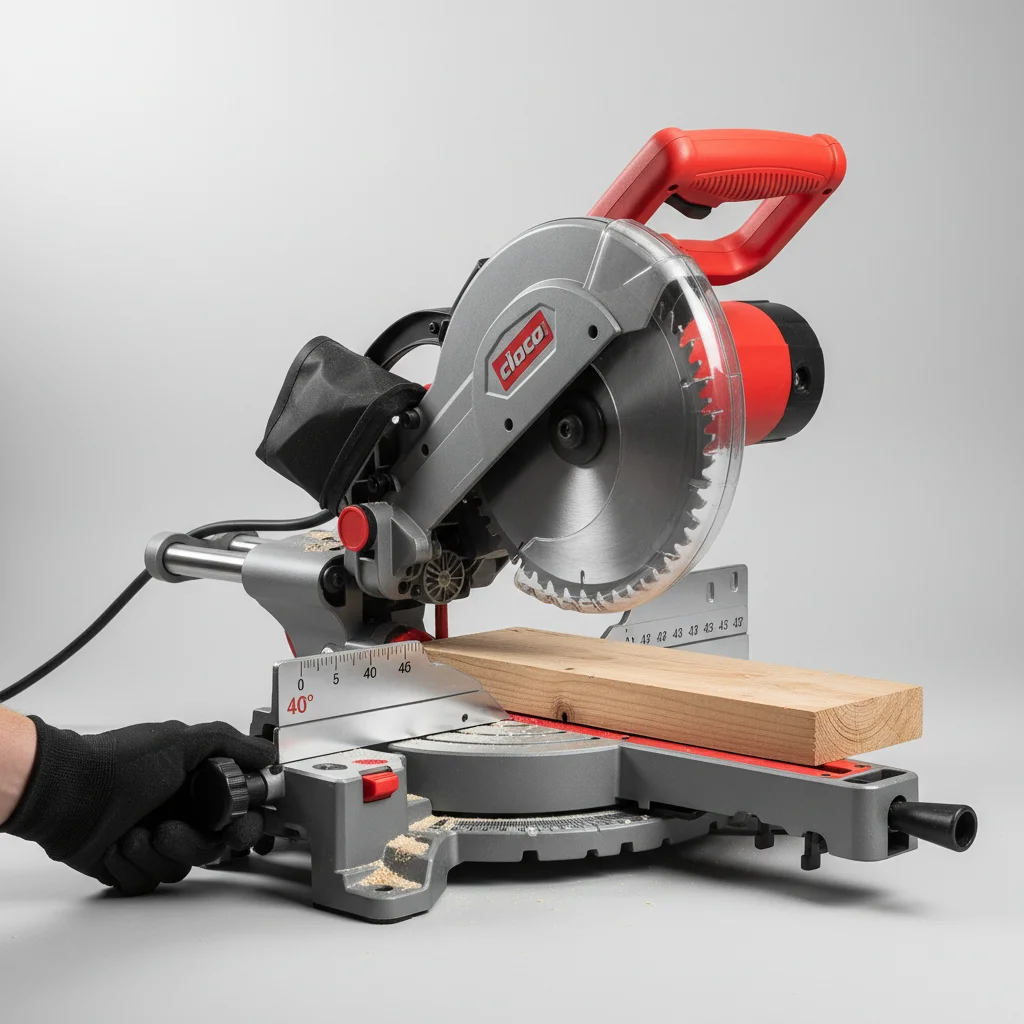
Achieving precise bevel cuts with your miter saw is crucial for professional-looking woodworking and DIY projects. The good news is that adjusting your miter saw’s bevel angle is a straightforward process that typically involves just a few key steps. By understanding the components and following a systematic approach, you can ensure your saw is calibrated for accuracy every time.
Most miter saws feature a bevel scale and a locking mechanism that allows you to tilt the saw blade to a specific angle, usually up to 45 degrees in both left and right directions, and sometimes even further. This guide will walk you through the process of adjusting your miter saw’s bevel angle for flawless results.
Understanding Your Miter Saw’s Bevel System
Before making any adjustments, familiarize yourself with the bevel components on your specific miter saw. Typically, you’ll find a bevel lock lever or knob, a bevel scale with angle markings, and sometimes positive stops at common angles like 0, 22.5, 33.9, and 45 degrees. The bevel lock secures the saw head at the desired angle, while the scale provides the visual reference. Always consult your saw’s manual for model-specific instructions and safety warnings.
Some advanced miter saws feature a dual-bevel capability, meaning the head can tilt both left and right without needing to flip the workpiece. Single-bevel saws only tilt in one direction, requiring the material to be reoriented for opposing bevel cuts. Understanding your saw’s capabilities will help you plan your cuts more efficiently.
Step-by-Step Bevel Angle Adjustment
Adjusting the bevel angle is a simple process. First, ensure your saw is unplugged for safety. Locate the bevel lock lever or knob, which is usually at the front or rear of the saw’s base. Loosen this lock to allow the saw head to tilt. Carefully tilt the saw head to the desired angle, aligning the indicator with the corresponding mark on the bevel scale. Once the angle is set, firmly tighten the bevel lock to secure the saw head in place. Always double-check the angle with a digital angle gauge or a reliable protractor for maximum accuracy, especially for critical cuts.
- Unplug the miter saw for safety.
- Locate and loosen the bevel lock lever or knob.
- Carefully tilt the saw head to the desired angle.
- Align the indicator with the correct mark on the bevel scale.
- Firmly tighten the bevel lock to secure the saw head.
Calibrating Your Bevel Angle for Precision
|
Our Picks for the Best Miter Saw in 2026
As an Amazon Associate I earn from qualifying purchases.
|
||
| Num | Product | Action |
|---|---|---|
| 1 | HAUTMEC 14 Inch Clamping Miter Box with Adjustable Jaw & 4 Anti-Slip Clamps, Heavy Duty ABS Mitre Saw Box with 22.5°, 45°, 90° Cutting Angles for Woodworking, Trim, Frames, DIY Projects – HTHDM25036 |

|
| 2 | SKIL 3601-02 Flooring Saw with 36T Contractor Blade, Red and black |
|
| 3 | Metabo HPT 12-Inch Compound Miter Saw | Xact Cut LED Shadow Line System | Dual Bevel | C12FDHB |
|
| 4 | Stanley 1-20-600 Saw Storage Miter Box with Saw, Black |
|
| 5 | WEN MM0713 9.5-Amp 7.25-Inch Single Bevel Compact Sliding Compound Miter Saw with LED Cutline Guide, Black |
|
| 6 | Miter Saw Laser Guide - Miter and Portable Saw Laser Guide, Miter & Portable Saws |
|
| 7 | WEN Universal Collapsible Miter Saw Stand, 350-Pound Capacity (MSA200) |
|
| 8 | Olson Saw 35-241 Fine Kerf Saw 35-550 42 tpi with Aluminum Thin Slot Miter Box, Slot Size .014-Inch, Slot Angles 45, 60, 90, Cutting Depth 7/8-Inch, Pack of 1 |
|
| 9 | Makita LS0816F 8-1/2” Slide Compound Miter Saw |
|
| 10 | Seesii Mini Circular Saw with Laser Guide,4.8A 4000 RPM Compact Corded Circular Saw with Rip Guide,3 Blades (4-1/2") for Wood,Soft Metal,Tile,Plastic Cutting,Max Cut Depth 1-11/16"(90°),1-1/8" (45°) |
|
Even with careful adjustment, factory settings or minor impacts can sometimes throw off your saw’s calibration. To ensure perfect 90-degree and 45-degree bevels, it’s wise to periodically check and calibrate your saw. Use a reliable machinist’s square or a digital angle finder to verify the blade’s angle relative to the saw’s fence and table. If an adjustment is needed, most saws have small set screws, often located near the bevel scale or pivot point, that allow for fine-tuning. Make small adjustments, re-tighten, and re-check until perfect.
For example, to check a 90-degree bevel, set the saw to 0 degrees bevel, then place a square against the blade and the saw table. If there’s a gap, adjust the set screw until the blade is perfectly perpendicular. The same principle applies to 45-degree checks, using a 45-degree angle gauge.
Tips for Consistent Bevel Cuts
Beyond proper adjustment, several practices can help you achieve consistent and accurate bevel cuts. Always use a sharp, clean blade appropriate for the material you’re cutting. Dull blades can lead to burning, tear-out, and inaccurate cuts. Ensure your workpiece is firmly clamped against the fence and the saw table to prevent movement during the cut. Make smooth, controlled cuts, allowing the blade to reach full speed before engaging the material. For critical projects, always make a test cut on scrap material to verify your settings before cutting your final piece.
Consider investing in a high-quality digital angle finder for quick and precise angle verification. These tools can significantly reduce setup time and improve the accuracy of your bevel cuts.They are particularly useful when working with non-standard angles or when frequently switching between different bevel settings.
Common Bevel Angle Issues and Troubleshooting
If you’re experiencing issues with your bevel cuts, several factors could be at play. If cuts are consistently off, re-check your calibration as described above. A loose bevel lock can cause the saw head to shift during a cut, leading to inaccurate angles; ensure it’s always tightened securely. Worn or damaged bevel scales can also make accurate readings difficult; if this is the case, a digital angle finder becomes even more essential. Sometimes, debris or sawdust can accumulate in the bevel mechanism, preventing smooth movement or accurate locking. Regularly clean your saw, especially around the pivot points and locking mechanisms, to ensure optimal performance.
Get our weekly buyer guide
Practical specs, not advice. Unsubscribe anytime.
